Fluorescent Penetrant Inspection (FPI)
Jargon of Fluorescent Penetrant Inspection
Before we get into the description it is better to know the jargon used in this process.
Fluorescent penetrant: A solution of fluorescent (glows under UV light) dye that can penetrate into fine surface discontinuities or flaws
Dwell time: The time the penetrant is allowed to be in contact with the test part’s surface
Background: The surface of the test part or the developer coating on it, against which the indication is viewed
Developer: The material that is applied on to the test part’s surface to facilitate bleedout of entrapped penetrant and to amplify the contrast of indications
Bleedout: The transfer of entrapped penetrant from discontinuities to form indications on the test part’s surface or on the developer coating
Sensitivity level: The ability of a penetrant system to indicate the presence of a surface discontinuity
Fluorescent Penetrant Inspection (FPI)
Fluorescent Penetrant Inspection is a non-destructive testing method to detect surface discontinuities like cracks, laps, seams etc., on machined parts, castings, forgings etc.
Equipment used for FPI
- Fluorescent penetrant
- Penetrant remover
- Developer powder
- UV lamp
The process involves the following 7 steps:
Step 1: Initial cleaning - To ensure that the test part’s surface is free from any contamination such as paint, oil, dirt, or scale that may fill a defect or falsely indicate a flaw.
Step 2: Penetrant application - The fluorescent penetrant is applied on to the test part’s surface by dip, spray or brush method and is allowed to stay on the part for a specific time called dwell time so that the penetrant seeps into the flaws.
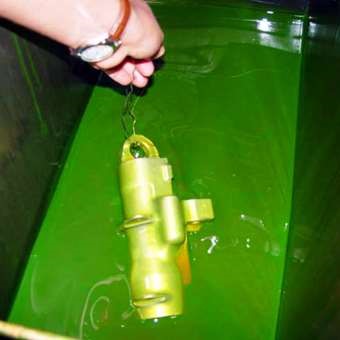
Step 3: Excess penetrant removal - After the dwell time has passed, penetrant on the outer surface of the material is removed.
Step 4: Drying – Casting surface is dried to make it free from any wetness.
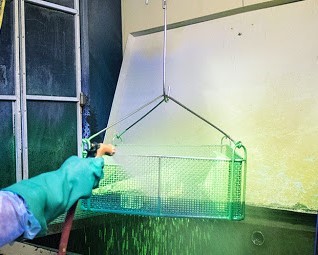
Step 5: Developer application – Developer which serves as a background against which flaws can more readily be detected is evenly applied on the test part’s surface and allowed to stay on the part for some time so that any entrapped fluorescent penetrant bleeds out onto the developer

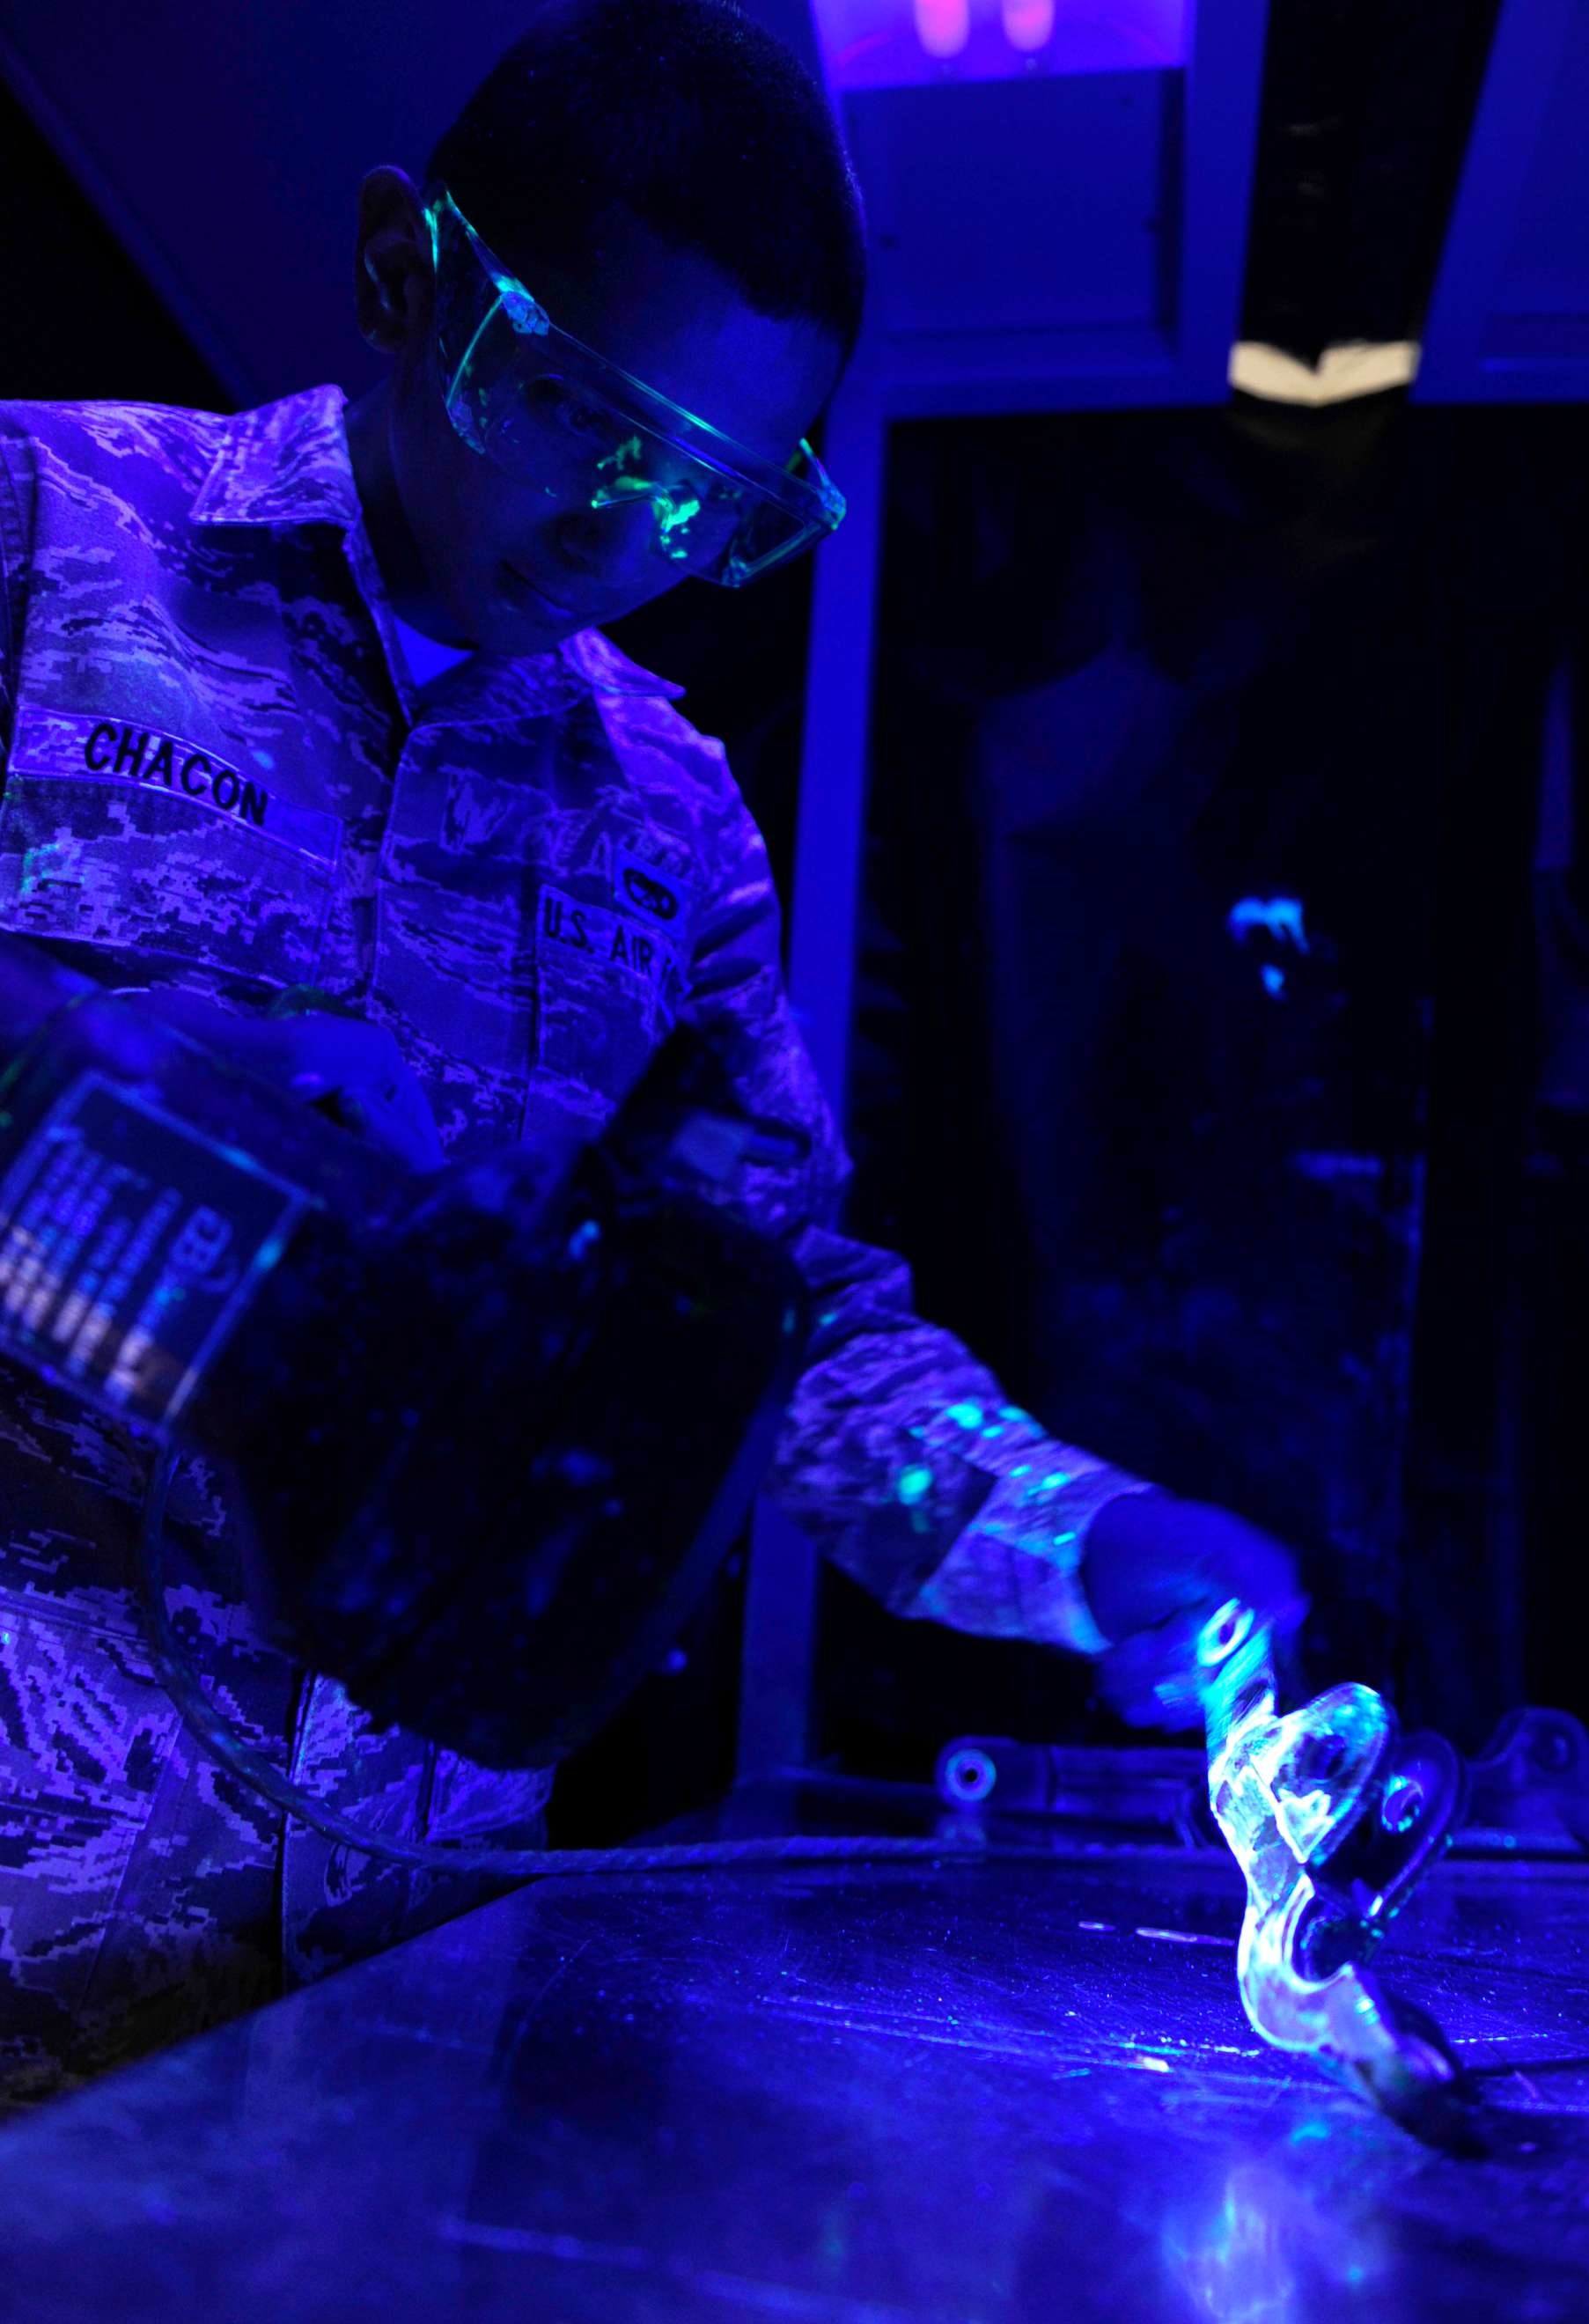
Step 6: Inspection – Developed parts are inspected with UV-A light in a dark room to find the defects on casting surface indicated by bleedout.
Step 7: Final cleaning – Post inspection, developer and penetrant are cleaned from the part’s surface before moving to the next process.
Process Control
The most important parameters are dwell time of penetrant and proper removal of excess penetrant.
Reference Standards for the Process and Calibration
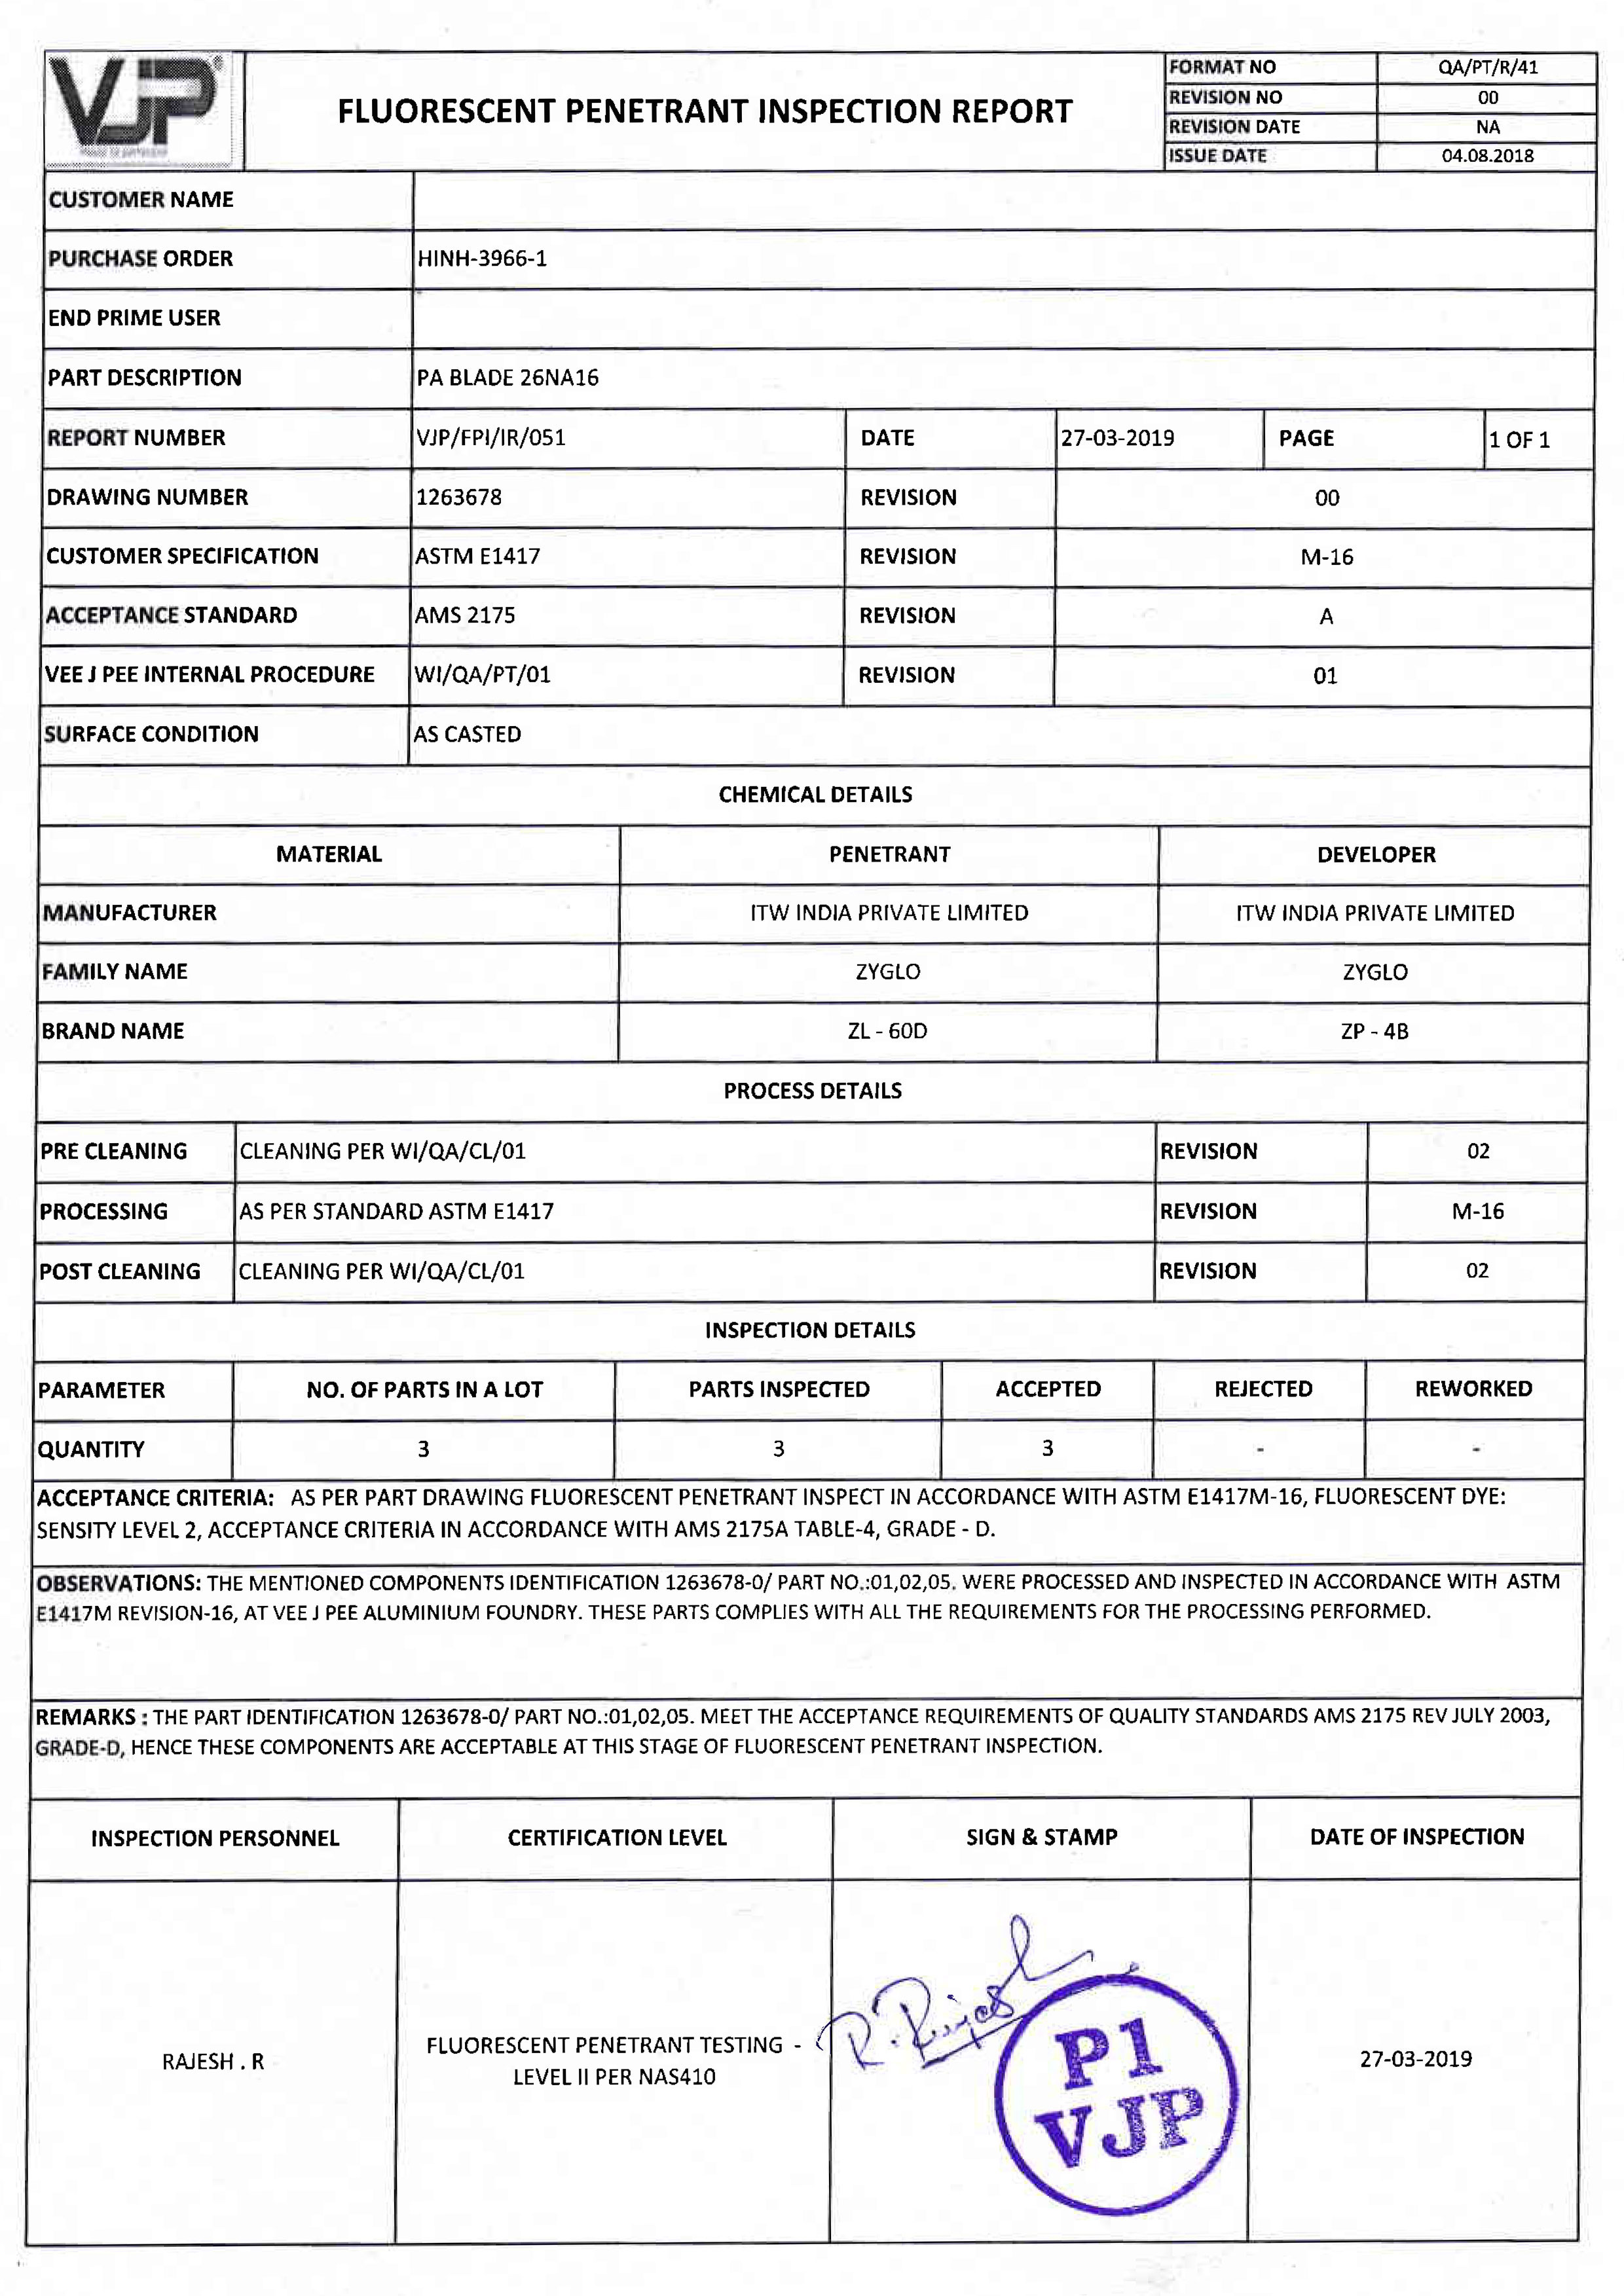
ASTM E1417
Liquid Penetrant Inspection testing needs to meet the standard practice ASTM E1417. The ASTM standard sets the basic parameters for sensitivity levels, sprays, brush application, dwell time, process time, and temperatures.
Reference Standards for the defect criteria
AMS 2175
The AMS 2175 standards set the basic acceptance criteria, sampling and definition of class and grades to meet the customer requirement.
Inspection Report